An afternoon tea was just what I needed this last week. With the beautiful weather we have been enjoying this winter, I was eager to enjoy an afternoon tea on the porch.
You can’t serve tea by itself so I decided to make lemon cream filled sandwich cookies to enjoy on the porch in the sunshine. However, I chose the day that it decided to rainy and drop 20 degrees to set up my tea. At first I had high hopes that it would just gently rain and we would still be able to eat outside; eventually the wind picked up and the rain started to come under the porch and I decided to move my tea inside. I did manage to take a few pictures!
These little cookies are perfect with tea or coffee. They consist of a lightly lemon flavored sugar cookie and a lemon butter cream filling.
I found this recipe in a Bon Appetite magazine from a year or two ago. It was intended to replicate a recipe from a restaurant that served a similar cookie and a reader had requested the recipe.
A few changes that I made to the original recipe include the addition of vanilla extract to the butter cream filling and the cookie dough. I also reduced the amount of sugar in the cookie dough and frosting in order to make the cookies be a little "tangy", like anything lemon flavored should be. I also made extra lemon juice reduction and added it to the butter cream filling for more lemony flavor. Add more flavor and reduce sugar... my two goals when baking.
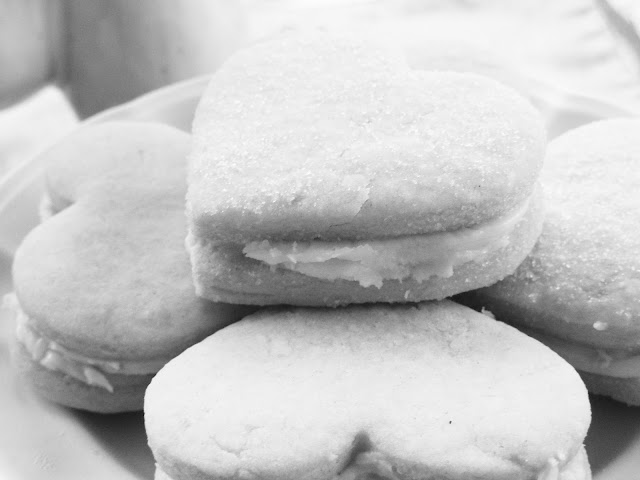

Lemony Sandwich Cookies
(adapted from Bon Appetite magazine recipe)
Lemon Sugar Cookie
2/3 c. fresh lemon juice
1 tbsp. finely grated lemon peel
3 3/4 c. all purpose flour
1 tsp. salt
1/2 tsp. baking soda
1 c. unsalted butter, room temperature
1 c. sugar
2 eggs
2 egg whites (Can substitute 1 whole egg for the egg whites without affecting texture)
Boil lemon juice and lemon peel in a small saucepan until mixture is reduced to 3 tablespoons. Pour into small bowl and cool.
Sift flour, salt, and baking soda into medium bowl.
Using electric mixer, beat butter in large bowl until fluffy. Add sugar; beat until blended. Beat in eggs one at a time, then beat in yolks. Beat in 2 tablespoons lemon juice reduction. Add dry ingredients and stir to combine. Cover dough and chill until firm, at least 4 hours and up to 1 day.
Preheat oven to 375°F. Line a baking sheet with parchment paper. Roll out dough on a lightly floured surface to 3/8" thickness. Using a 2" cutter, cut out 48 cookies.
Bake cookies until golden at edges, about 12 minutes. Let cookies fully cool before spreading filling.
Lemon Butter Cream
1 1/2 tbsp. finely grated lemon peel
1/8 tsp. salt
1/2 c. unsalted butter, room temperature
1 1/2 c. powdered sugar
Using back of spoon, mash lemon peel and salt to paste in medium bowl. Add butter and reserved 1 tablespoon of lemon reduction. Using electric mixer, beat until fluffy. Add sugar in 3 batches, beating after each addition until blended.
Spread 2 teaspoons filling on flat side of 1 cookie. Top with another cookie, flat side down.
These cookies can be made 2 days ahead. Store in an airtight container in refrigerator.
